A large percentage of our customers don’t know about our 3D processes, and so Naturally, they often have many questions. The purpose of this document is to educate you, our customer, so that you know what to expect and can make a more informed decision regarding your order.
BEGINNING THE 3D PROCESS
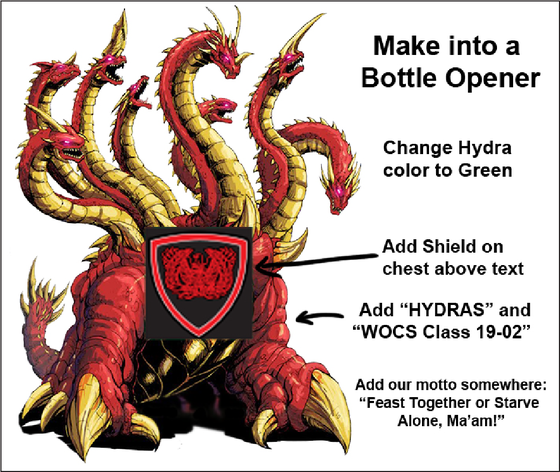
We typically build the 3D by taking reference images that are provided by the customer and editing them. While we do have the ability to search for suitable images online, providing us with the specific images that you would like to see used helps us tailor the design more accurately to what you are envisioning.
REQUESTING 3D
The most straightforward way to request a 3D coin is to simply send in a clear hi-res reference image with your inquiry or revision along with a description of how you would like it incorporated and a list of any changes you’d like to see made.
3D PROCESS FROM START TO FINISH
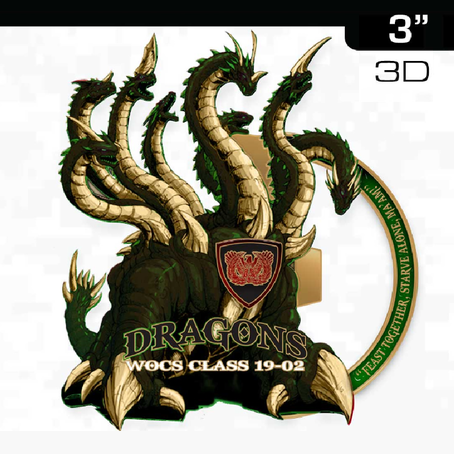
1. PROOFING
The first step of the process is creating a digital mock-up of what your coin would look like. If it’s not exactly what you were expecting it’s alright! At this point, we can still make revisions, so just send over any changes you’d like to see made and we can make the adjustments.
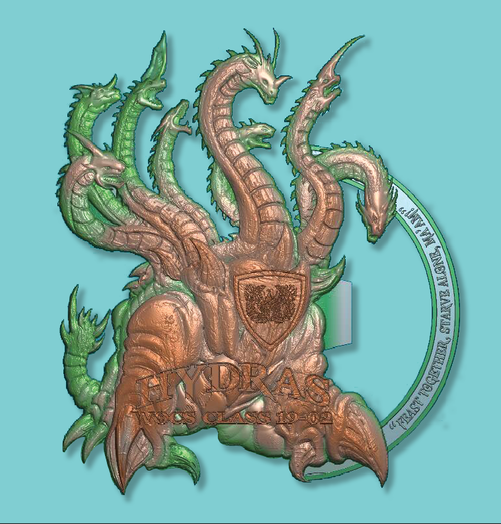
2. 3D MAPPING & APPROVAL
At this point, we send the images of the 3D mapping to you so that you can review them. The coloring in the images represents varying levels of relief. The areas with the orangish color in the top image are higher up, while the greenish areas are more recessed. The bottom image is more of a grayscale view of what it will look like. Don’t be worried that there isn’t any color in these images, they’re solely for referencing the 3D, and all colors will be added later during our production process. Once you approve the 3D design we give the green light to production and they begin the process of building your custom design. IMPORTANT: Once the 3D is approved, no further changes can be made as they are “set in stone” and production begins at this point


Once you’ve approved the 3D and we’ve given our facility the go-ahead to start production, they create a mold and use it to stamp out your custom product. After they’re all stamped out, metal plating is applied to the product via an electro-plating process to permanently bond the finishes to the base metal. If coloring is necessary (as is with most orders) they are typically hand-painted using an enamel fill. After the colors dry, they are “baked” using heat to make the enamel is more durable.
